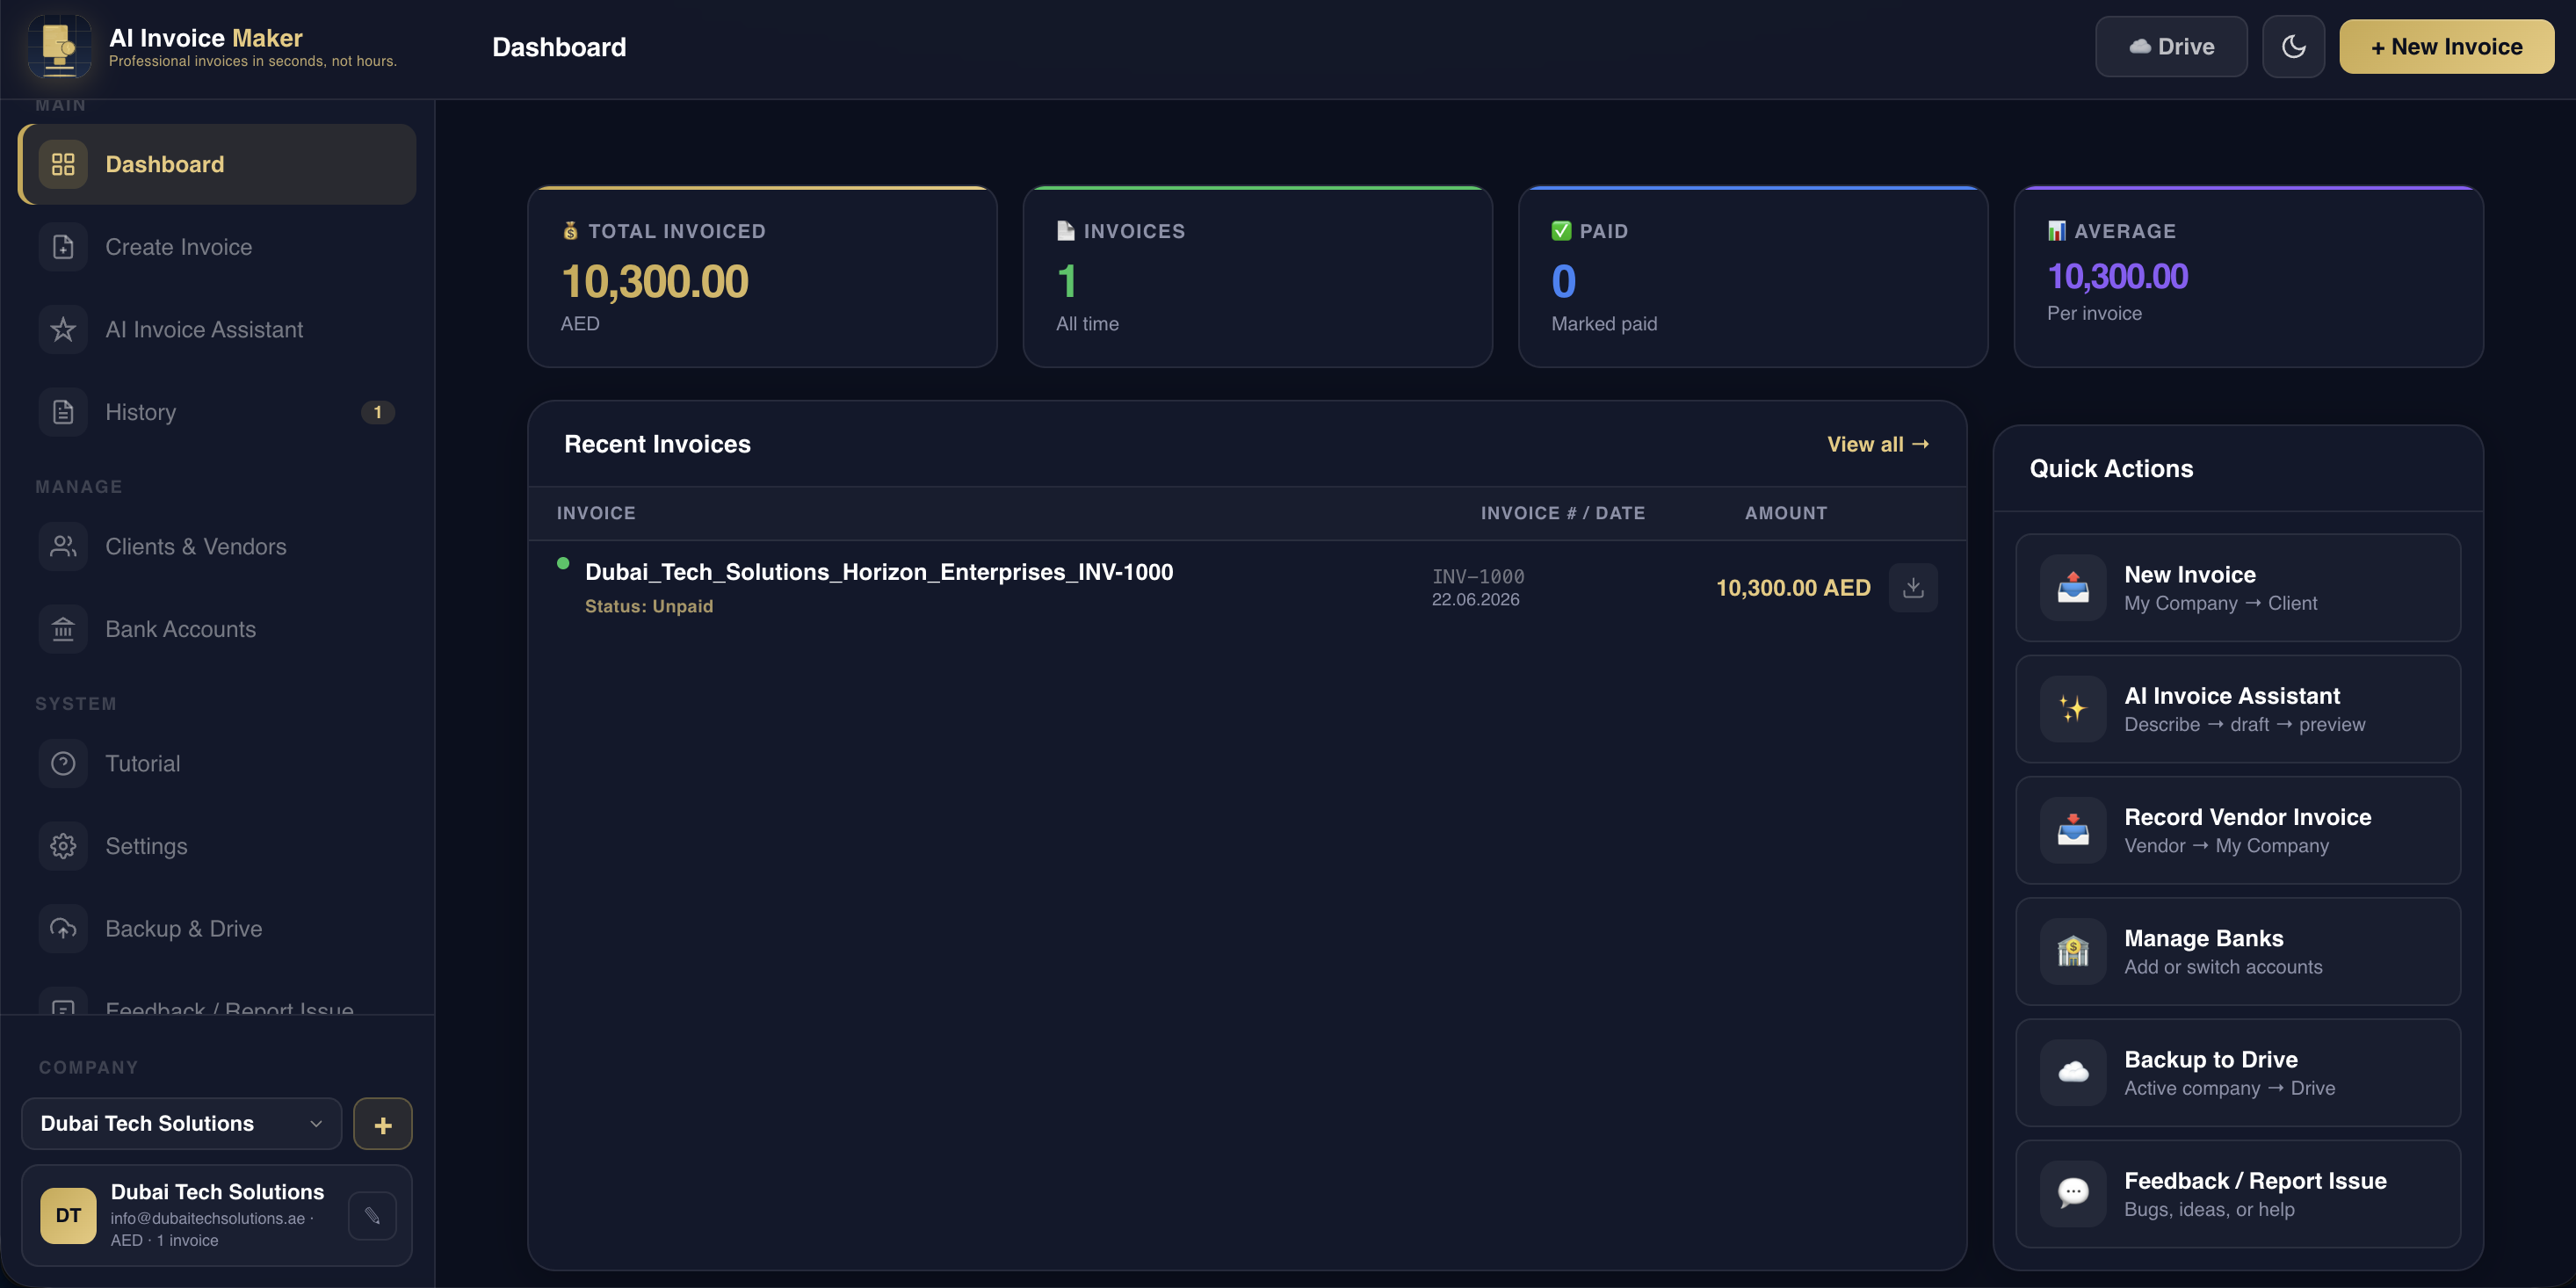
AI Invoice Maker User Guide

Complete guide to creating, managing, downloading, emailing, and backing up invoices in the main app.

Invoice Workflow

Dashboard Overview

Your home screen in app.html — stats and shortcuts for the active company.

💰Total InvoicedSum for active company
📄InvoicesAll-time count
PaidMarked paid
📊AveragePer invoice

Quick Actions

  • New Invoice — My Company → Client
  • AI Invoice Assistant — Describe → draft → preview
  • Record Vendor Invoice — Vendor → My Company
  • Manage Banks — Add or switch accounts
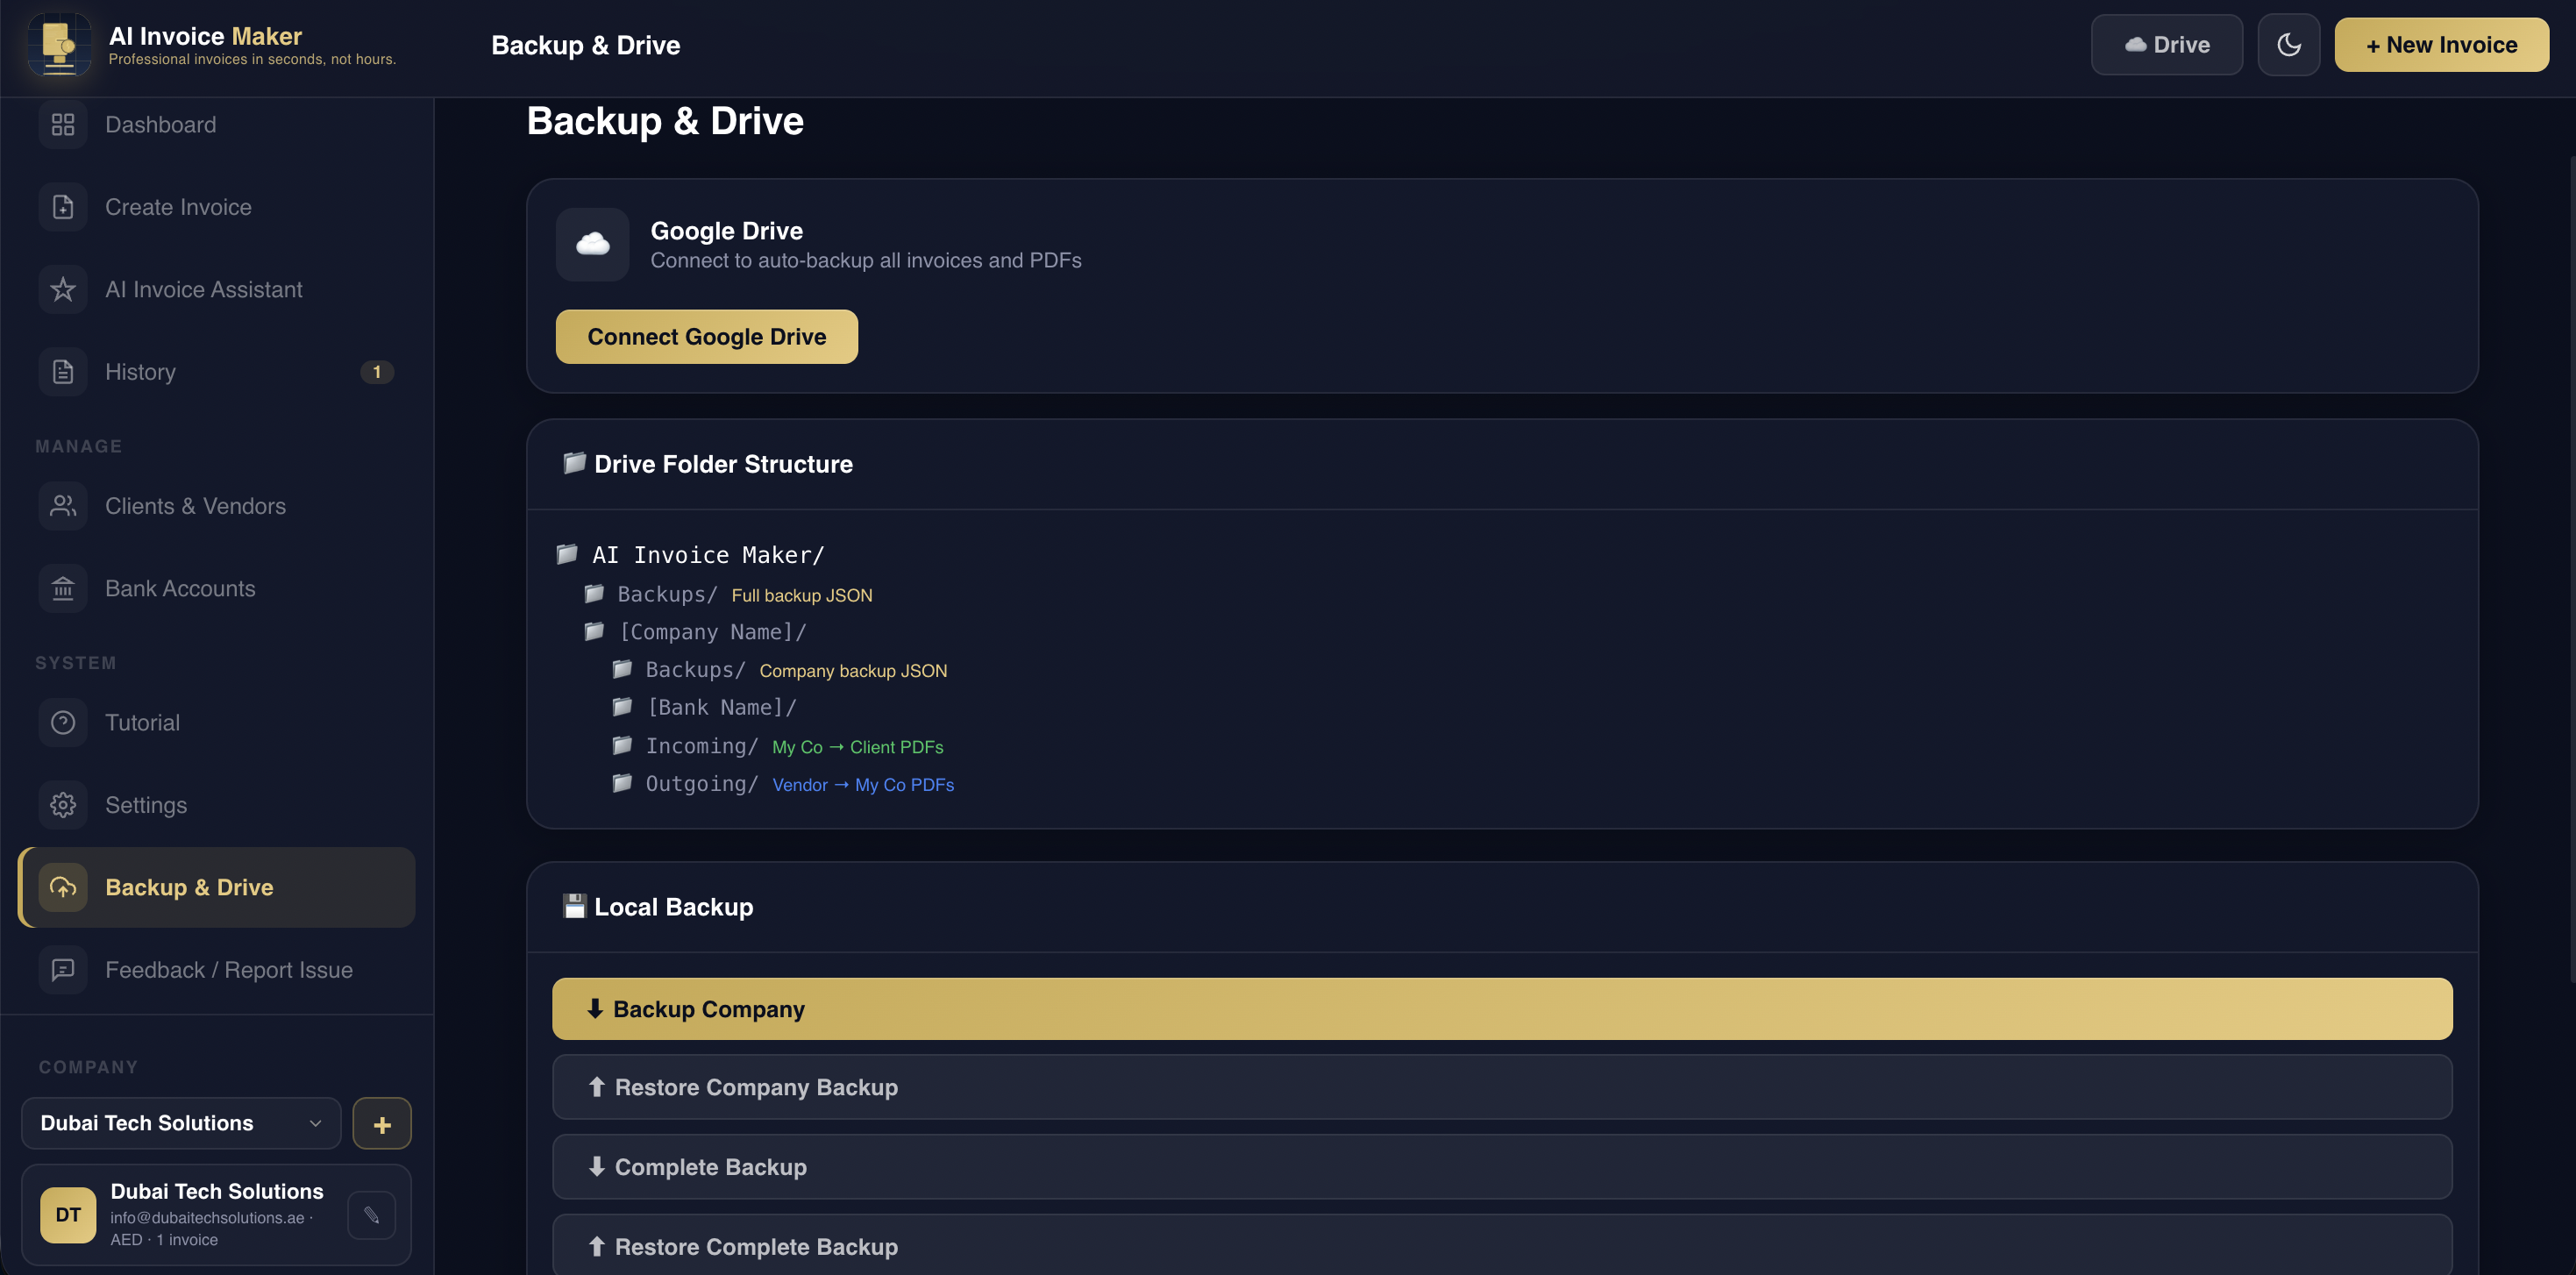
  • Backup to Drive — Active company → Drive

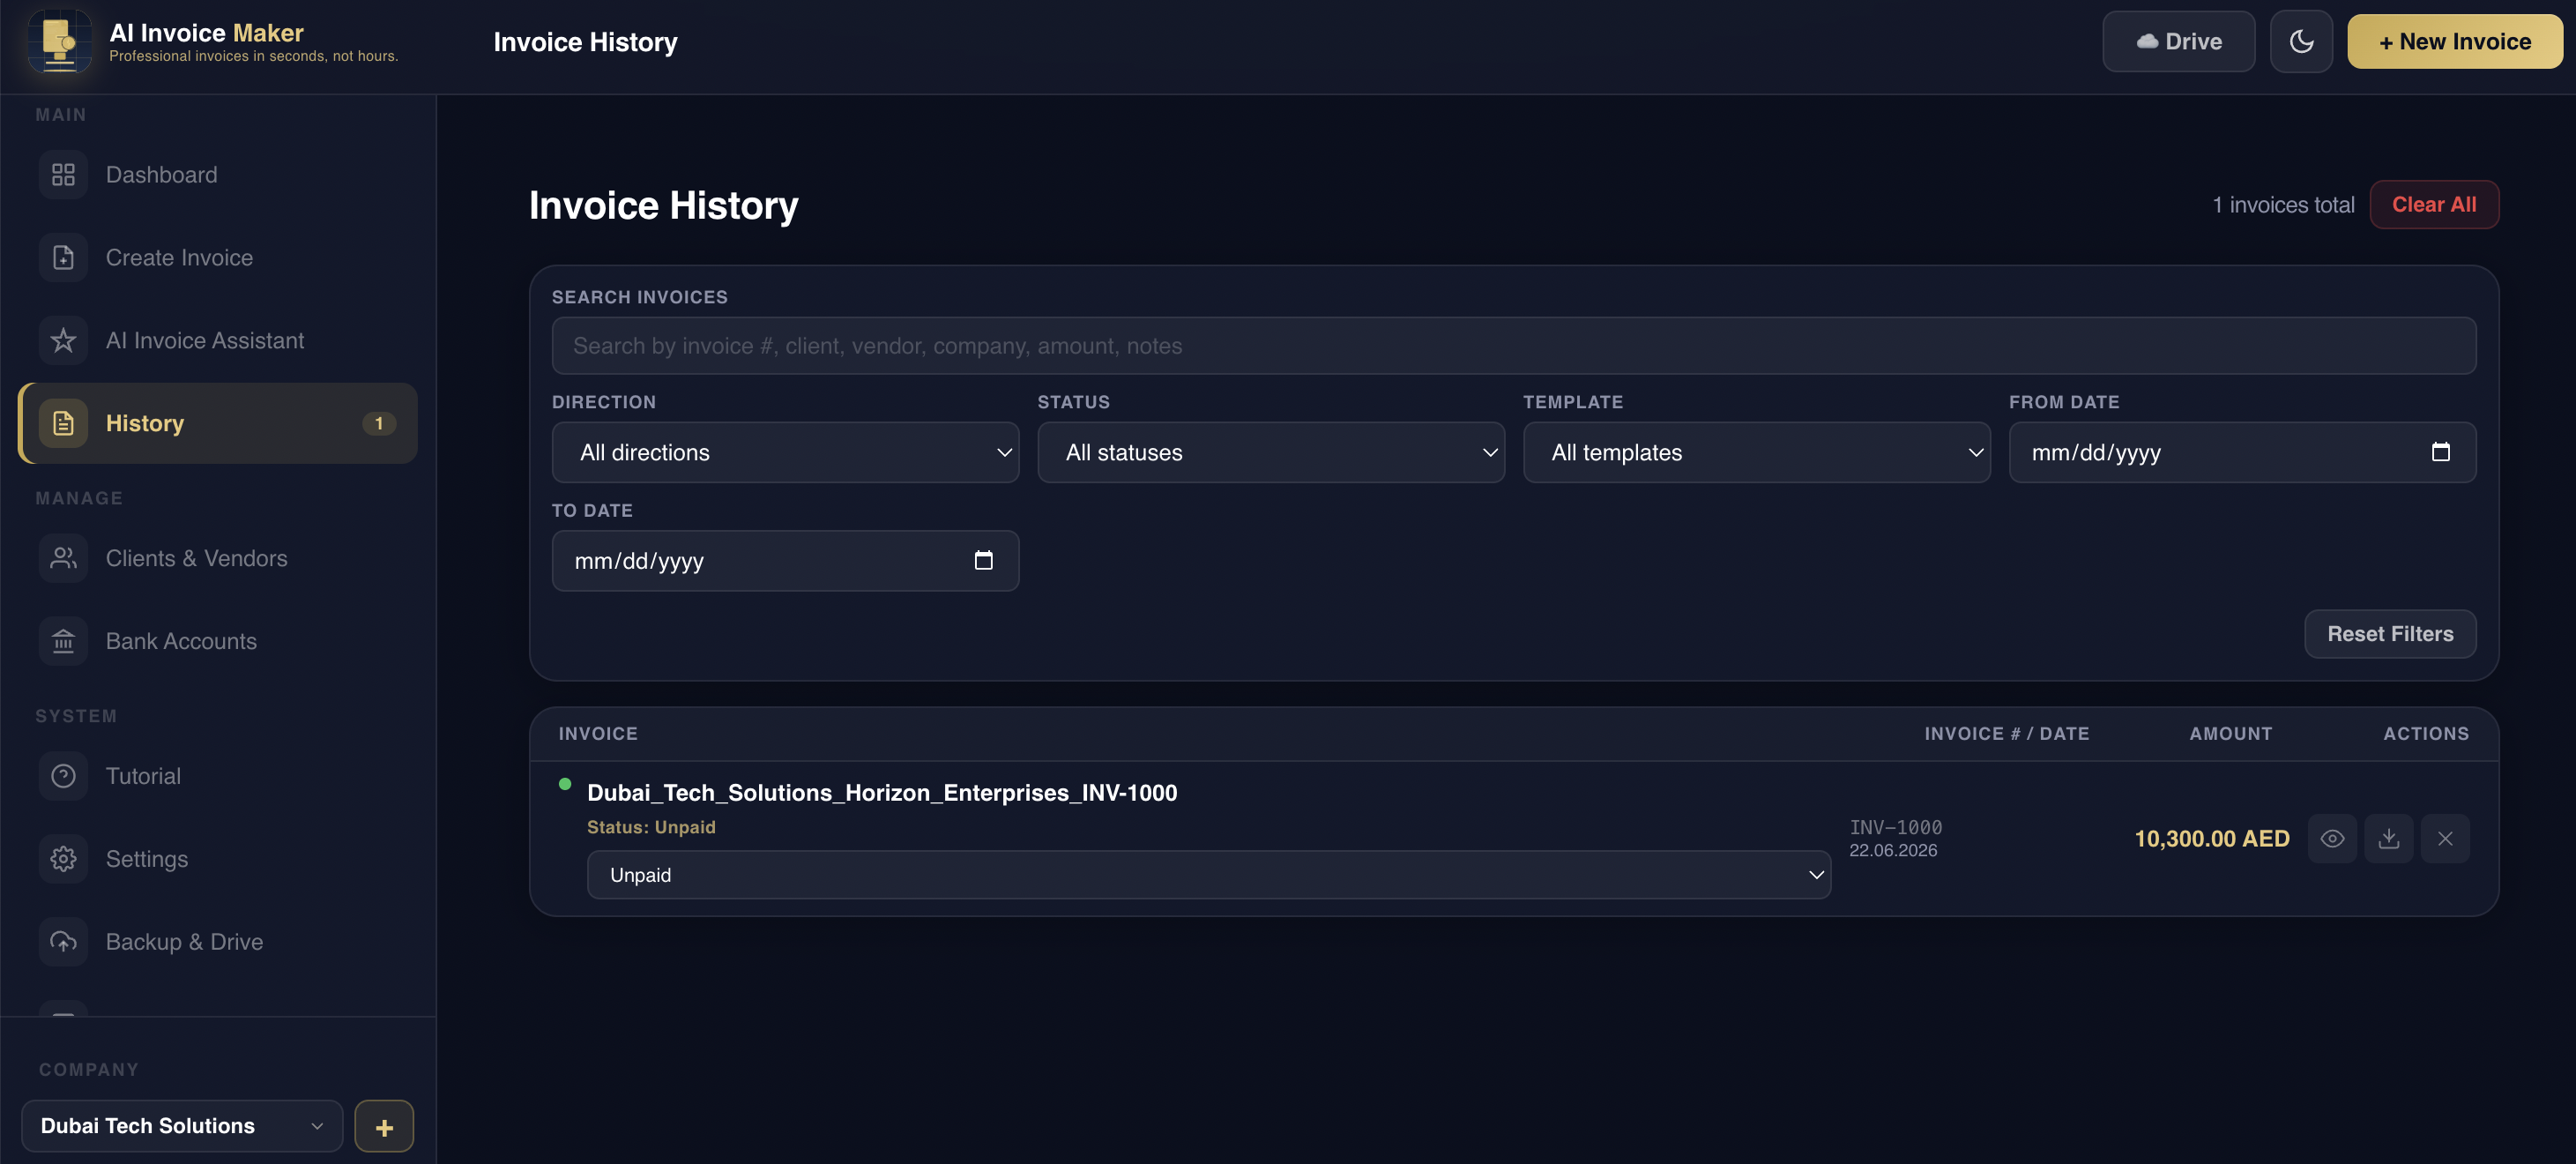
Open via sidebar → Home. Recent invoices link to full History.

AI Invoice Maker dashboard with statistics, recent invoices, and quick actions
Dashboard — stats, recent invoices, and quick actions for the active company.

Company Setup

Company details appear on outgoing PDF invoices. Set up before your first invoice.

  1. Open Settings in the sidebar.
  2. Fill Company Info: name, address, email, phone, TRN/VAT, currency, prefix, payment days, footer, default template.
  3. Upload Company Logo (PNG/JPG, max 2MB).
  4. Optionally upload Company Stamp (PNG, transparent).
Tip: Logo and stamp are managed per company when using multiple companies.
Settings page with company info, logo upload, and company stamp
Settings — company profile, logo, stamp, and invoice defaults.

Multi Company

Multiple company profiles — each with isolated settings, banks, clients, and history.

Create a company

  1. Use the company selector in the sidebar footer.
  2. Tap +Add Company.
  3. Enter name, address, email, phone, optional TRN → Save.
  4. Complete Settings and banks for that company.

Switch companies

  1. Select another company from the sidebar selector.
  2. App loads that company's isolated data.
Tip: Company-specific settings are saved in Settings after you switch.

Screenshot not available yet.

Banks

Bank accounts appear in the payment section of your PDF invoices.

  1. Open Bank Accounts+ Add Bank.
  2. Enter bank name, account title, number, IBAN, SWIFT.
  3. On Create Invoice, pick the bank under Receive Payment To or vendor bank fields.
Tip: Add multiple banks — choose a different account per invoice.
Bank Accounts page showing saved bank details
Bank Accounts — add, edit, and set active payment accounts.

Create Invoice

Build invoices with a live preview panel on the right.

  1. Open Create Invoice (sidebar or + New Invoice).
  2. Choose direction: My Company → Client or Vendor → My Company.
  3. Pick a PDF Template and fill invoice number, dates, status.
  4. Confirm From details, then add client, items, and preview.
Create Invoice screen with direction, templates, details, and live preview
Create Invoice — direction, template picker, invoice details, and live preview panel.

Client Details

Bill To / From fields change based on invoice direction.

Outgoing — My Company → Client

  1. Enter client name, address, contact under Bill To.
  2. Tap Saved ▾ for saved clients.
  3. Toggle Save client for future use.

Incoming — Vendor → My Company

  1. Enter vendor details under From (Vendor).
  2. Use Saved ▾ and Save vendor for future use when needed.
Bill To client form with saved client picker
Client details — name, address, contact, and save-for-later toggle.

Items & Services

Line items and totals — manual entry or Smart Auto-Fill.

Manual items

  1. Tap + Add Item → description, qty, unit price.
  2. Check the Total at the bottom.

Smart Auto-Fill

  1. Enter target amount → adjust line count → tap ⚡ Generate.

Add an optional Footer Note before previewing.

Smart Auto-Fill, line items, and invoice action buttons
Items & services — Smart Auto-Fill, line items, footer note, and preview actions.

Templates

15 PDF templates on Create Invoice — live preview updates on switch.

  1. Open PDF Template on Create Invoice.
  2. Tap a thumbnail → check Live Preview.
  3. Set Default Template in Settings for new invoices.
Gold AccentModern SplitClean MinimalCorp NavyEmeraldRose GoldMidnightBlueprintLetterheadDubai StyleStartup BoldLegal/TaxCreativeGradientReceipt
PDF template thumbnail grid with fifteen designs
Templates — fifteen PDF designs with live preview on Create Invoice.

Preview Invoice

Review layout and totals before exporting.

  1. Watch Live Preview update as you type.
  2. Tap 👁 Preview Invoice or Preview & Actions.
  3. Verify company, client, items, bank details, and footer.
Tip: Live Preview updates instantly as you fill the form.

Screenshot not available yet.

Download PDF

PDFs generate on your device — no upload required.

  1. Open preview → tap Download.
  2. Share via your device's share sheet, or download from History.

Screenshot not available yet.

Send Invoice by Email

Email the PDF directly from the app.

  1. Tap Send Invoice on Create Invoice, History, or AI drafts.
  2. Enter recipient email → optionally Send copy to me.
  3. Verify address → send.
Note: Verify the recipient email before sending. AI Invoice Maker is not responsible for emails sent to an incorrect recipient.

Screenshot not available yet.

Save & History

Invoices save on-device. History helps you find and manage them.

  1. Open History in the sidebar.
  2. Search by #, client, vendor, amount, or notes.
  3. Filter by direction, status, template, or dates.
  4. Row actions: download, share, email, update status.

AI drafts save to AI History from the AI Invoice Assistant.

Invoice History with search filters and invoice list
History — search, filter, and manage saved invoices.

AI Invoice Assistant

Built into app.html — sidebar or Dashboard quick action. Part of the main workflow.

  1. Open AI Invoice Assistant from the sidebar.
  2. Chat & Draft — describe your invoice → tap Send.
  3. Refine with follow-ups → review the draft card.
  4. Preview, download PDF, email, or save to AI History.
Tip: Tap New AI Invoice to start a fresh chat thread.
AI Invoice Assistant chat interface inside the app
AI Invoice Assistant — chat, draft review, and AI History inside app.html.

Clients

Saved clients and vendors for faster repeat invoicing.

  1. Open Clients & Vendors in the sidebar.
  2. Add or edit client and vendor profiles.
  3. On Create Invoice, use Saved ▾ to auto-fill.

Screenshot not available yet.

Google Drive Backup

Sync data and PDFs to Google Drive, organized by company and bank.

  1. Backup & DriveConnect Google Drive.
  2. Backup Company to Drive / Sync Company PDFs / Restore.
  3. Complete Backup to Drive for all companies + AI workspace.
  4. Local JSON: Backup Company / Complete Backup.

Folders: AI Invoice Maker/[Company]/[Bank]/Incoming|Outgoing/

Backup and Drive page with Google Drive and local backup options
Backup & Drive — connect Google Drive, sync PDFs, and export local backups.

Settings

Branding and defaults for the active company.

  • Company Info — profile fields and defaults
  • Company Logo — outgoing PDF header
  • Company Stamp — outgoing invoices

Switch companies in the sidebar before editing another profile.

Screenshot not available yet.

PWA Installation

Install for quick access and offline use after first load.

🍎 iPhone / iPad
  1. Safari → Share → Add to Home Screen → Add
🤖 Android
  1. Chrome → Install App or Add to Home Screen
🖥 Desktop
  1. Chrome/Edge → Install icon in address bar
Tip: Works offline after the first load.
iOS Safari share sheet showing Add to Home Screen
Step 1 — Safari Share menu → Add to Home Screen.
iOS Add to Home Screen confirmation for AI Invoice Maker
Step 2 — confirm name and tap Add.

FAQ

Answers from real app functionality.

Does the app work offline?

Yes, after the first load. Install to home screen for best results.

Can I use multiple companies?

Yes — company selector in the sidebar. Each company has isolated data.

Can I email invoices?

Yes — Send Invoice from Create Invoice, History, or AI drafts.

How do backups work?

Google Drive or local JSON — per company or complete backup with AI data.

Can I add my logo?

Yes — upload in Settings for outgoing PDFs.

Where is the AI Assistant?

Inside app.html — sidebar → AI Invoice Assistant.

How many templates?

Fifteen on the Create Invoice screen.

Save clients for reuse?

Yes — Clients & Vendors or Save toggle on Create Invoice.